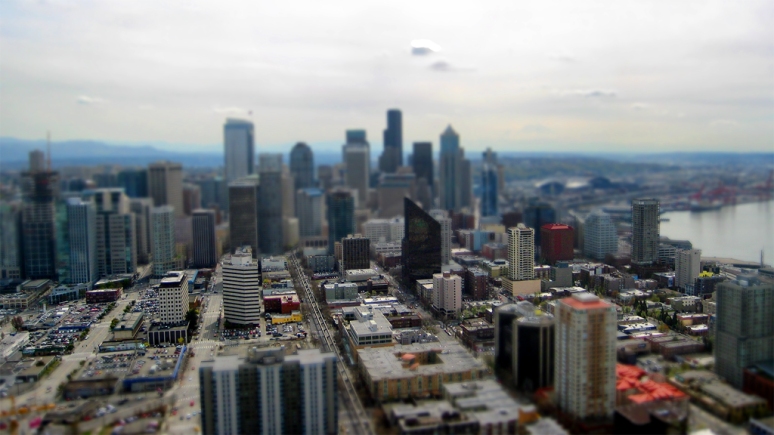
Seattle Tilt Shift
You have to click to see it larger!
Yesterday I shared a tilt shift image on my iphoneography blog and it seems like a lot of you are into that style based on the views I got yesterday. I thought I would share my first t/s image from Seattle back in 2009.
To create a good tilt shift image, you have to start with the right image. First, you should shoot the subject from an angle that makes you feel like you’re looking down at a model train set. Don’t shoot from directly above, it won’t come out right. In my image above, I was up on the observation deck of the space needle. You can’t get a much better angle for a cityscape.
If you’d like to try creating a tilt shift image in photoshop, this is the tutorial that I learned from. I modified the workflow a bit so that I could make fine adjustments to a layer mask:
After making my selection, I saved my selection (from the menu above, select>save selection) and deselected. Then, I applied the lens blur to a duplicate layer. Next, I loaded my selection and applied it to a layer mask. This allows me to mask in or out any areas that need fine tuning. I also opted to use an adjustment layer of hue/saturation because its non destructive and allows me to fine tune it later if I want. I finished this image off with Pro Contrast in ColorEfexPro4 because its far superior to the contrast tool in photoshop.
For more tilt shift inspiration, check these images out.


Pingback: Silly Self Portrait « iPhone Photographer
This looks great! I love it =)
LOVE! It does look like a little town for a train set. Your composition and blur is perfect for this.
Oh yeah, I’m gonna love all the creative tips your sharing here, aren’t I?
Haha I hope so.